Sunday, June 20, 2010

More 80 grit Sanding

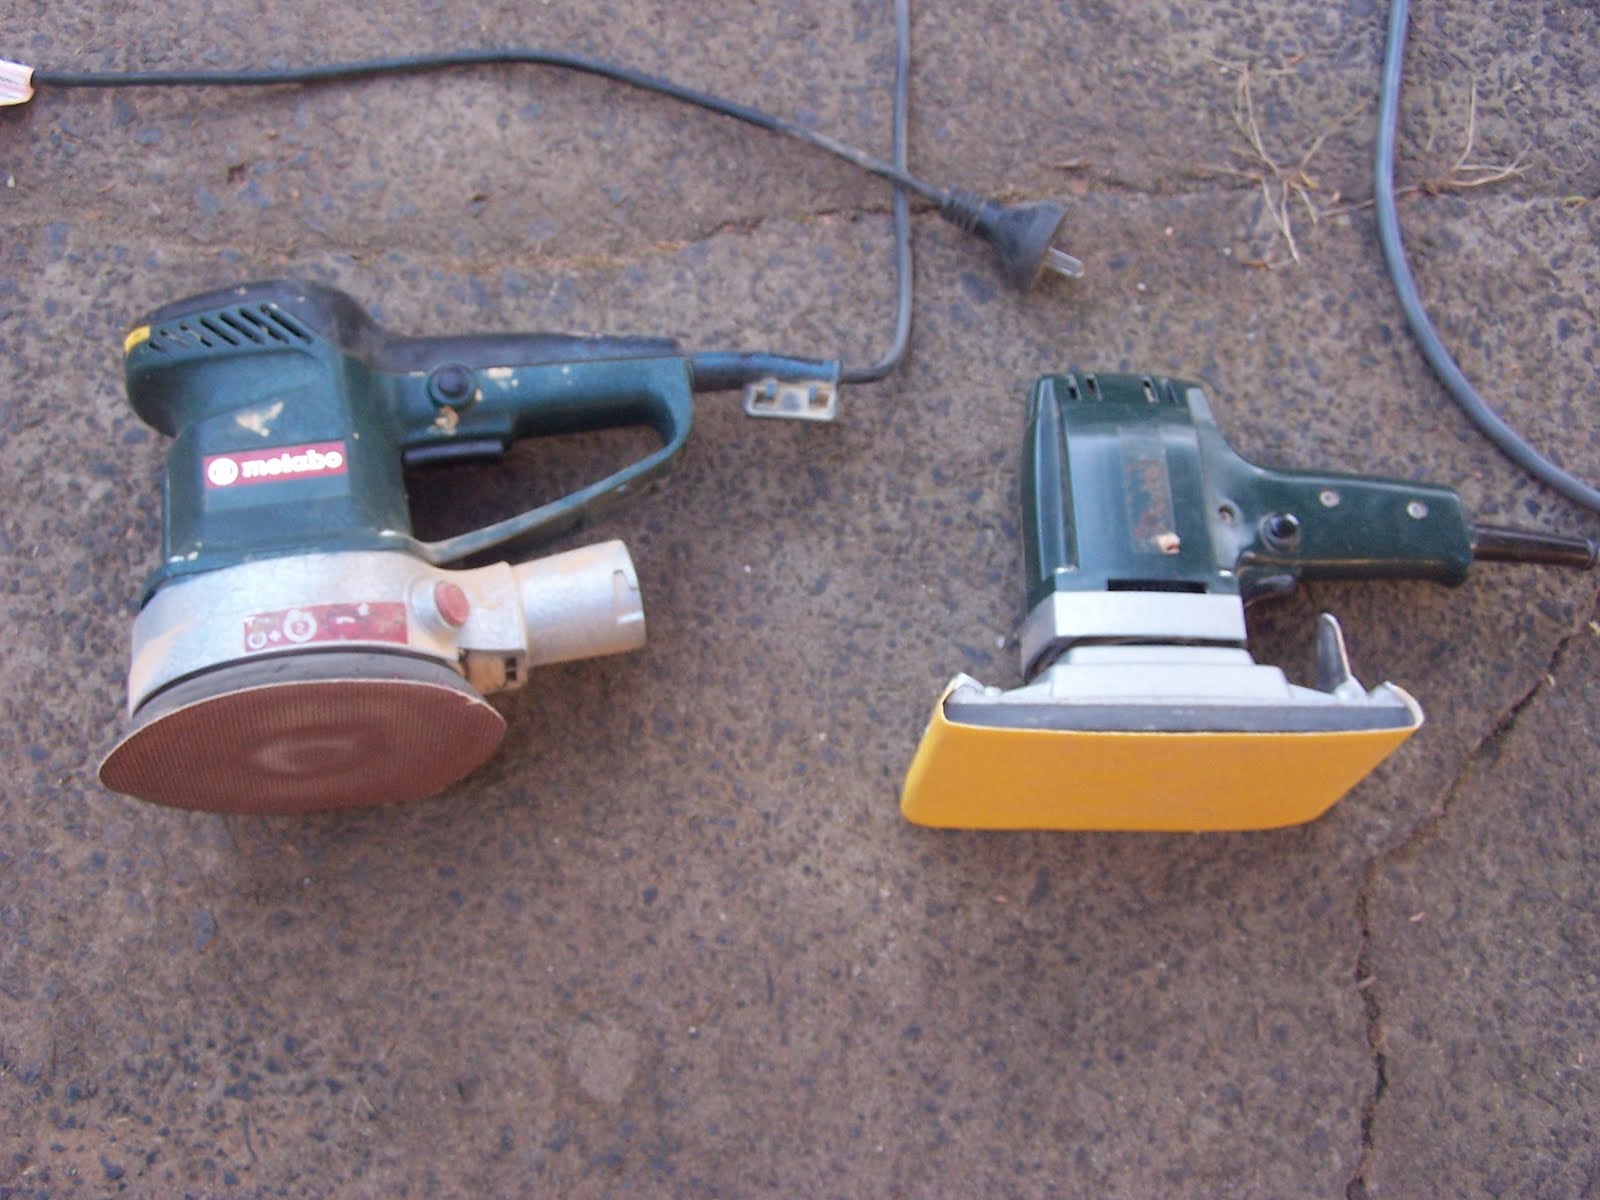
Many more hours of sanding on autopilot over the last couple of days, using my Metabo orbital sander (not random) & I thought it was looking pretty good. I had about a quarter of the boat left to do when my good mate Rick (the shipwright, who owns Shapes Shading Solutions & has been an absolute godsend to me on this build) popped in to loan me a proper, industrial strength, variable speed, random orbital sander. I had asked him to just order some paper for my own random orbital sander, but he figured it was just a DIY (non-industrial) type & therefor not up to the task, hence the loan. Here's a photo of his random orbital next to my normal orbital sander.


What a machine. It worked so much quicker & left a much nicer finish, even using the same 80 grit paper. In no time at all, I'd finished the last quarter of the boat and gone right back over the rest again to clean it all up just that bit more. She's now been sanded back as far as I dare with this grit & I'm loving the grain that's been revealed.


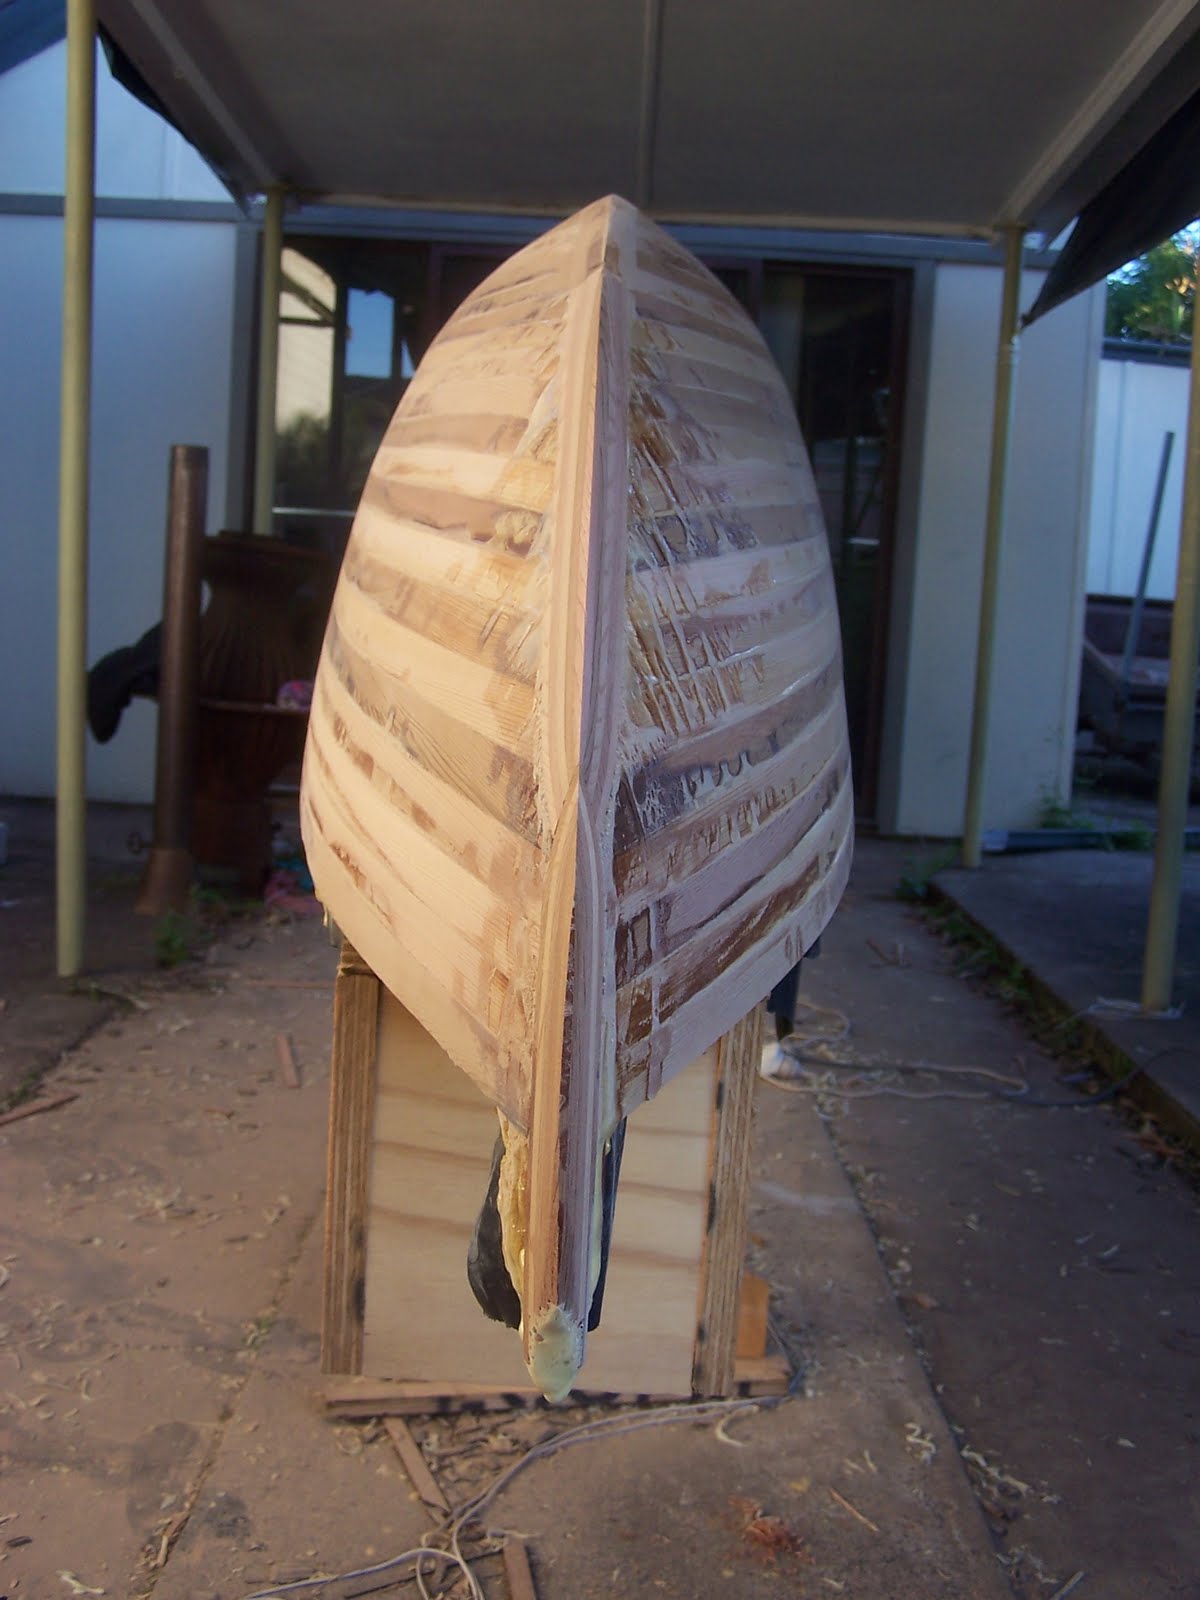
The only thing letting the whole job down is the poor finish at the bow & stern, which are now paper thin & definitely can't be sanded any further.


As I was fortunate enough to have Rick at my place, I showed him my progress & asked him for his ideas as to how I might possibly still achieve a clear finish. He agreed that it would be criminal to cover up all that timber and, after mulling it over for a while, said the best option might be to paint a feature strip up from the painted waterline, along the keel edge & sweeping up parallel with the stem, effectively covering the stuffed up bits. This makes lots of sense & I reckon that's just what I'll do. I'm thinking it will look pretty cool if I can integrate some sort of Polynesian pattern/design into it on either side of the bow/stern.

So now I have to fill the slight hollows at the bow/stern, in preparation for fiber glassing. I'm going to try using the Bote-cote glue/filleting powder, so late this afternoon I set up a bit of an experiment, utilising the failed test panel from before. Basically I just stapled a handful of planking offcuts, forming a hollow. I also rigged a piece perpendicularly, so I could see how it goes with forming the fillets for the inner stems, bulkheads, etc.


I started out trying to be all scientific & accurate with measuring the epoxy, hardener & fillet powder, but in the end, it all seemed very random & "pure arsework". Still, it didn't look too bad when I was done.


So now, depending on how this turns out, I'll probably use this stuff to fill the crappy hollows in the ends. I'm also hoping to source a long sanding board, so as to make sure the sides are nice & fair. Then the whole lot gets a final sand with 120 grit & will be ready for....wait for it.... fiber glassing. I'd better hurry up & get that second fiber glassing test panel done.

Thursday, June 17, 2010

Second Sanding at 80 grit

Another couple of days on the sander. I'm going back over the whole hull again with the 80 grit paper, this time really focussing on getting rid of all the glue marks and seeing just how smooth I can get it. I've gotten over three quarters of the whole boat done now, and it's looking great (except for the bow & stern of course). The next couple of photos show the difference between before & after.


Here's some more shots of what I've done so far....


So, making good progress I think. Hopefully I can start looking to fiber glass this weekend (fingers crossed).

Tuesday, June 15, 2010

Outer Stems, Start of Scraping/Sanding Hull

I haven't posted about my progress over the last couple of weeks, mainly because I've been "head down, bum up" trying to make some. It's been the usual roller coaster ride but I'm happy to say that I have at least gotten a little bit of momentum going.

First up, I started sanding the other side of the bow with the 40 grit (which is a similar texture to asphalt). It did rip through quite fast, so I tried to maintain some sort of control with it.


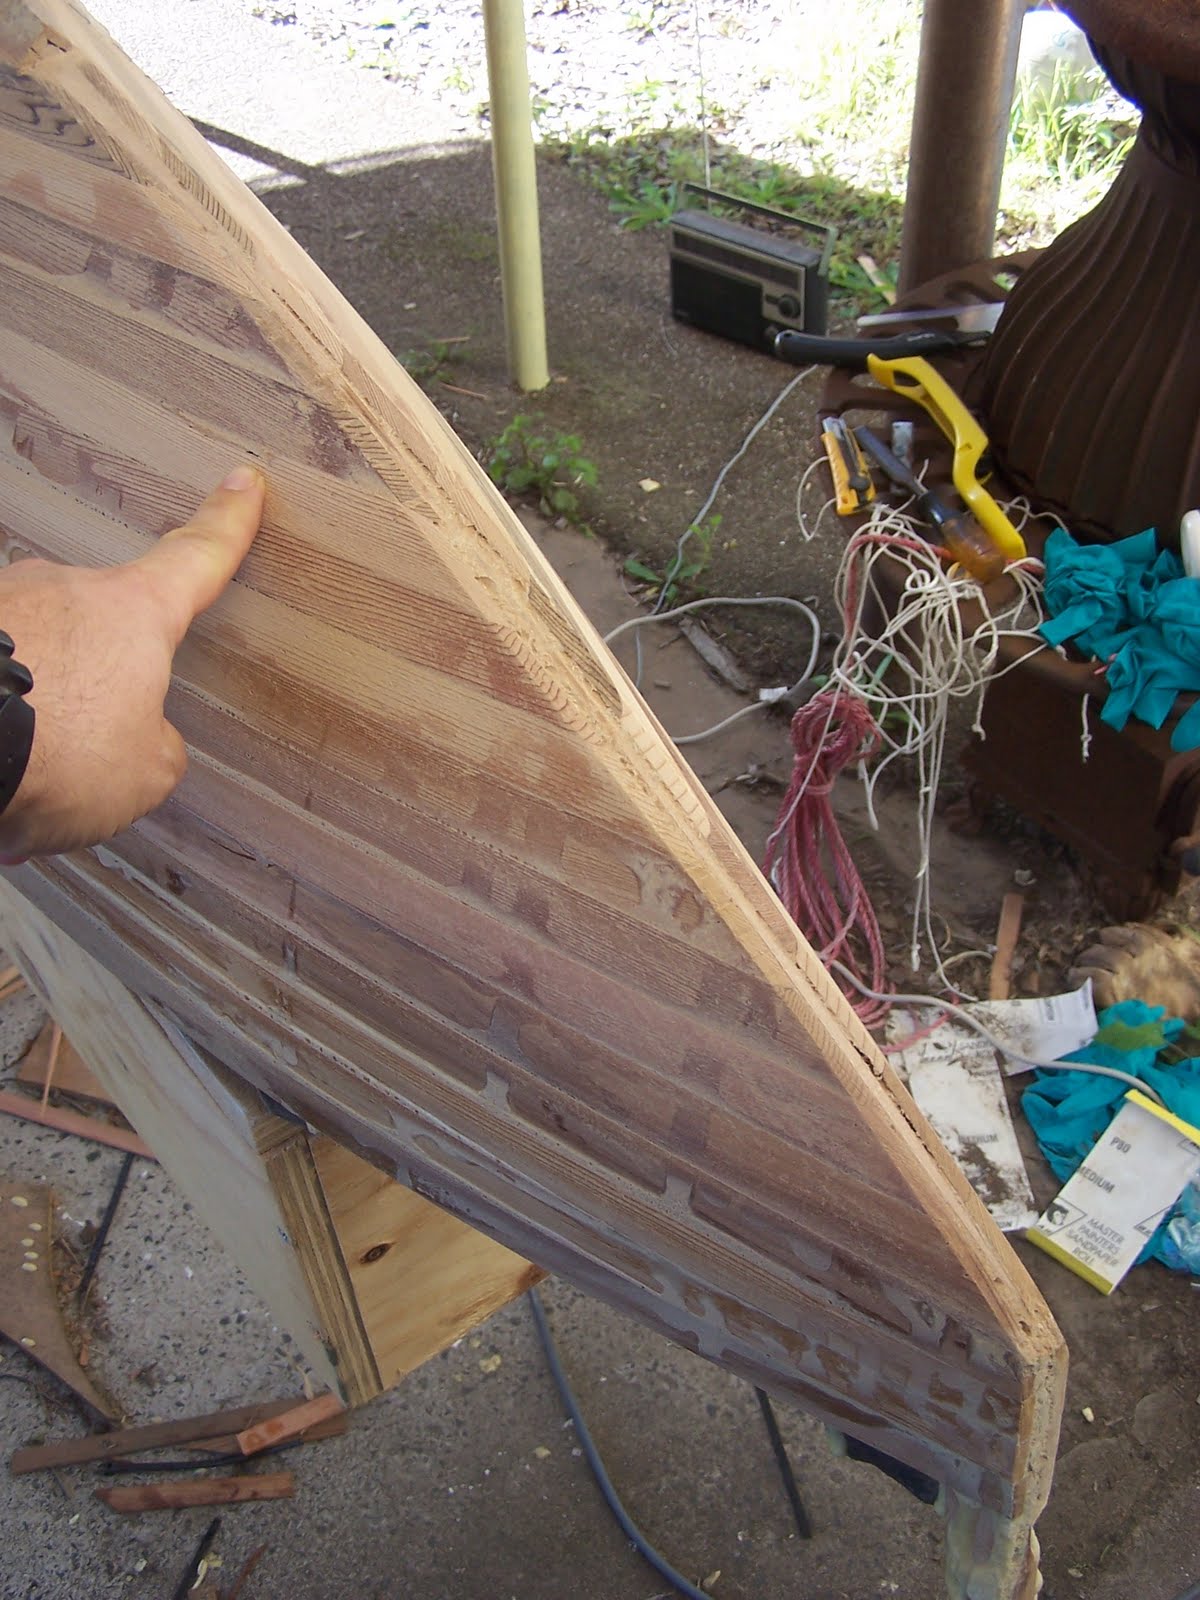
It's a good thing I did, because before long I started to grind right through the hull. In the photo below, I'm pointing to the spot where it's paper thin & there's a tiny hole. At least I can fix this, since there's going to be a fillet connecting the inner stem through this area, which should reinforce it ok.


This was a serious set back. This bit was the first part where the planks were a bit staggered, forming almost a clinker finish. The stern area is much worse. I was hoping that I could sand it out, but obviously there just isn't enough meat in the hull to do that. It seems that by using the convenient (& cheaper) thinner 4 mm planks instead of 6 mm, your planking job must be that much more accurate (which mine definitely isn't). My only option now is to use fairing paste all over, meaning that I can't have a clear timber finish. Bugger! It's also going to be interesting, trying to sand the glue runs in all the stepped bits. Can you fair straight over dried glue?

Anyway, moving on, it was time to laminate up the outer stems. Below is the stern with the outer stem components laid out ready.


I glued the vertical sections first & used tape to hold them in place. Could've used an extra six pair of hands (bloody fiddly).


With that done, I then went and pulled out all of the staples (yes, there actually was about 2, 500 of them).

Once the glue had dried, I removed the tape and started fitting the longer sections of the outer stems.


I pretty much tailor fitted each long lamination in the outer stems, allowing for the different angles & bevels, striving for as perfect a fit as I could. Once again, the trusty sanding station proved it's worth it's weight in gold.


Another 10, 000 liters of glue & it was job done.


Again, I used tape to secure it all.


After it all dried, I remove the tape & trimmed the excess lengths. Note the Christmas pudding effect of the glue on my nicely sanded planking.


Next, it was time to roughly shape the new outer stems. I tried the surform & found it to be the perfect tool. It was so easy to control & I had the stems shaped down real quick. Very pleasant to use. The angle of the sun in this photo really show the extent of the edge-set of the planks in the stern.


Those jobs done, it was finally time to tackle the monotonous, mind numbing task of scraping all of those ridiculous tonnes of glue off. The shot below shows how bad it looked.


Living within my happy place, I stuck at it for days. I found a wide, flat chisel the best tool for this job, although you have to be careful not to let the blade tilt at all, causing it to gouge vast, ugly furrows into your planking, whilst in a glazed-eyed daze.

Anyway, after a couple of (long) day's work, I finally finished. Any fleeting feelings of pride & satisfaction were quickly dispelled when I suddenly realised that I now had the totally exciting prospect of commencing sanding. I set up with 80 grit paper on my orbital sander & just jumped right in. I'm currently up to about two thirds of the way down both sides (starting from the stern).

You probably can't see too much difference in the photos below, but it looks way better. There's still lots of glue runs in between the stepped plank edges (as expected), which confirms what a truly crap job I did with the planking, however, never underestimate my ability to bodge a job up so it looks good.

Starboard side from astern, before...


and after.


And the port side, before......


and after.


The photos below show the worst of the hollows & plank misalignment in the stern. I'm going to need an arse-load of fairing paste to make this lot look good again.


So, there you go. You're up to date. I've got a little bit of time off, so I'm going to try & fit as much in as I can (around the usual interruptions of course). I'm very keen to get this thing fiber-glassed & faired asap. I'll try not to leave it so long before posing next time (this lot has taken ages).

Friday, June 4, 2010

Planking Finished

Well, believe it or not, on Wednesday I finally finished fitting all of the hull planks. The last few were really fiddly & I had to pull out all of the big guns (see photo below).


These photos show how fine the last planks on each side were. I'm a bit worried that they were different sizes (just how asymmetrical is this hull?).


Ta daaa. Doesn't look too bad I think. We'll see once I get all that glue stripped off though.


The next steps are to laminate both outer stems & shape them in to the hull, remove all of the approx 2, 500 staples and sand/fair the whole hull exterior, prior to epoxy glassing.

Yesterday I got stuck into pulling out the staples around the bow area. I found the best way was to place an old scraper next to/underneath a staple, then slip/wriggle an old skinny chisel under the staple. Once the staple moved a bit & I could get a good grip with some pliers, I'd just pull it straight out.

Then I started trying to strip some glue back before sanding. Although the surform is ok, I found a sharpish flat chisel best but I did have to control myself. A couple of times I got carried away, slipped & started gouging the planking, but it's not too bad. Once I'd gotten as much of the glue off as I could, I began sanding with some 80 grit paper on my orbital sander (soft rubber backing pad). This did a good job, although it was pretty slow going & I quickly chewed through my small stock of paper. I've got to say, I'm pretty excited at the sight of the grain coming through now. The photo below shows how it's looking. There are numerous gaps that will need filling & the area still requires more sanding, but if the rest of the hull looks this good then there should be no problem with having it left showing and it should all look shit hot. Fingers crossed.


Back I went to Bunnings for more sandpaper, but this time I got a 15mtr roll of 40 grit. Hopefully this coarser paper should rip through the rest of it quickly.

The weather lately has been pretty miserable, but at least it hasn't held me up too much. That changed this morning, it's pissed down all day. In future, I will only build inside properly enclosed shelter. I can't tell you how frustrating it is to finally be making progress, only to be held up by inclement weather again.

Sunday, May 30, 2010

Planking - More Delays

I'm not frustrated (much). It'll all be finished when it's done. No sense worrying & hurrying, right? Bloody boat building..........

This weekend was to be my big opportunity to finally get my planking finished & start prepping the hull for fiber glassing. Starting to get somewhere now, aren't we. Schedule unusually clear, prospects looking incredibly positive. Who knew? Best laid plans and all that. Never underestimate external influences like, oh, I don't know, the bloody WEATHER!

So Saturday kicked off a bit slow as usual. Pretty buggered (I'd just worked six out of the last seven days, the majority being all 16 hour days (including commuting) and a pretty miserable, grey, drizzly day all round. Regardless, I got back into it feeling pretty good.

After fiddling around with the last lot of planks & sussing out a plan of attack, I realised that I might run out of glue, so I went to the hardware for more, plus some other stuff. Finally I got back home & renewed my efforts. One cool item I'd picked up was a "SurForm" (see below).


I've heard about these things before & was wondering if they'd be the go for the initial rough cleaning up of the hull. I started trying to clean up the bow stem a bit, to see how it performs. I'm also curious about what the planking looks like under all that glue.


It worked real well, quickly cutting through the glue & jutting bits of timber. I stopped when I started hitting staples, but it's at a point now where it can be finished off with a sander. Perfect for the job I think. Slightly worried about some of the planking I uncovered though (time will tell).


Anyway, then it was time to resume planking again. It was a pretty wet day and it was early afternoon, but I was (naively) still confident that I should be able to get the planking completed once & for all.

The planks in this part of the hull become more of a challenge for a couple of reasons.

Firstly, due to the more vertical aspect of the glue joint, the glue has more of tendency to roll straight out of the cove. To counter this, I started holding each new plank vertically upside down, then laying a strip of glue along the bead edge. Then reverse the plank, glue up the hood ends & fit it in. Messy but seems to be the bet option.


The second challenge turns out that each new plank now fits full length, meaning that I no longer need to use butt joints. So far I could re-cut the hood ends numerous times to achieve an almost perfect fit and then cut the other end for the butt joint to fall on a station mold appropriately. Now I have to cut hood ends at both ends simultaneously & just hope that I've gotten it right. Needless to say, my profound lack of carpentry skills is becoming appallingly apparent. Oh well, I'm hoping that drowning the joint with glue will fill it enough. At least this part will be under paint, so I can use heaps of filler if required. I'm not too worried about loss of strength in these areas, because this whole area will be doubled up with fiber glass. I'm also thinking about using a bit of the more structural type filler on the inside bilge area, especially to compensate for the poor garboard joints that I described earlier. Don't know if this is paranoid overkill, but since I'm planning to use this canoe in the surf at Box Head a lot, a piss weak hull bottom is the last thing I'm wanting to be worrying about.


The third thing I've found is the fact that these hood ends are now getting longer & longer, in fact way too long for my trusty little Japanese pull saw. There's only two levels to go now & the final one is going to have to be ripped full length, plus hood ends cut. It's power tool time.
Since it was by then pretty late & getting quite dark, I had to pull the pin & stop for the day. The photo below shows how close I got to finishing.


All of the news over the last few days has been filled with concern over some epic bad weather on the way, apparently due to hit this region on the Sunday. Heavy driving rain & cyclonic winds were predicted & we were warned to prepare for the worst.
"Bugger" I thought, "I'm going to lose a whole day now". Never mind, can't be helped I guess, so I had a good clean up and lashed the canoe in place, so it couldn't possibly blow over.

This morning dawned bright, clear & calm, as you can see in the photos below.


Since I could see lots of cloud on the horizon, I agonized for ages as to whether or not I should untie the boat & continue with the planking. Eventually I decided that it'd be bad to finally get it all finished and then have the bad weather hit, forcing me to tarp up & lash the hull again, this time with wet glued planks.

Instead I resolved to continue with my experimental test panel, which has sat in my shed for weeks. I gave the epoxied panel a quick sand and found what I had suspected. The epoxy mix was way too thick when I'd applied it & hadn't saturated the weave enough. Also, the single coat of epoxy wasn't thick enough, meaning that I'd had to sand into the glass cloth in a couple of parts.


I'd emailed Dave at Drive Marine (Boatcraft Pacific's agent here) sometime ago and asked him about it and he replied that I should use an additive that increases viscosity. So I picked up a bunch of scrap bits of cedar & whipped up another panel.


My plan is to order the additive (plus some other stuff) & have another go. This time, I'll also apply two coats of epoxy before the peel ply. If that all goes well, then I can go one step further & try applying the Aquacoat, to see how that looks finished. I'm glad that I spent this time experimenting with this system. I want to have it all properly sussed out by the time I actually go to apply it to my boat for real.

And how did we go with the apocalyptic weather predicted? Well, it's now about 1600 and it's still clear & sunny outside. Wonderful, wasted the whole day. I'm back to work Monday & Tuesday but then I have the rest of the week off to try & make some progress. Only problem is, they're now predicting rain for the whole week. Hopefully they're just as inaccurate with this prediction as they were with today's one.
Tuesday, May 25, 2010

Bit More Planking (nearly finished)

After yet another sluggish start this morning, I finally got stuck in to this planking stuff again.
I had hoped to knock the planking off once & for all today, so I gave it a red hot go.


In the end, despite a strong effort, it was close but no cigar. I guess I'd underestimated how long it takes to do all those fiddly hood ends (I reckon they do look good though). The following is a gratuitous bunch of show off photos, revealing how far I did get.


At least there should be no excuses not to get this part completed when I get my next window of opportunity (Sunday). This boat building business seems to take a lot longer to actually do than I initially thought (....of course, sitting around with the missus, swilling coffee for half the morning doesn't exactly speed things up....). Still fun though.