Sunday, May 30, 2010

Planking - More Delays

I'm not frustrated (much). It'll all be finished when it's done. No sense worrying & hurrying, right? Bloody boat building..........

This weekend was to be my big opportunity to finally get my planking finished & start prepping the hull for fiber glassing. Starting to get somewhere now, aren't we. Schedule unusually clear, prospects looking incredibly positive. Who knew? Best laid plans and all that. Never underestimate external influences like, oh, I don't know, the bloody WEATHER!

So Saturday kicked off a bit slow as usual. Pretty buggered (I'd just worked six out of the last seven days, the majority being all 16 hour days (including commuting) and a pretty miserable, grey, drizzly day all round. Regardless, I got back into it feeling pretty good.

After fiddling around with the last lot of planks & sussing out a plan of attack, I realised that I might run out of glue, so I went to the hardware for more, plus some other stuff. Finally I got back home & renewed my efforts. One cool item I'd picked up was a "SurForm" (see below).


I've heard about these things before & was wondering if they'd be the go for the initial rough cleaning up of the hull. I started trying to clean up the bow stem a bit, to see how it performs. I'm also curious about what the planking looks like under all that glue.


It worked real well, quickly cutting through the glue & jutting bits of timber. I stopped when I started hitting staples, but it's at a point now where it can be finished off with a sander. Perfect for the job I think. Slightly worried about some of the planking I uncovered though (time will tell).


Anyway, then it was time to resume planking again. It was a pretty wet day and it was early afternoon, but I was (naively) still confident that I should be able to get the planking completed once & for all.

The planks in this part of the hull become more of a challenge for a couple of reasons.

Firstly, due to the more vertical aspect of the glue joint, the glue has more of tendency to roll straight out of the cove. To counter this, I started holding each new plank vertically upside down, then laying a strip of glue along the bead edge. Then reverse the plank, glue up the hood ends & fit it in. Messy but seems to be the bet option.


The second challenge turns out that each new plank now fits full length, meaning that I no longer need to use butt joints. So far I could re-cut the hood ends numerous times to achieve an almost perfect fit and then cut the other end for the butt joint to fall on a station mold appropriately. Now I have to cut hood ends at both ends simultaneously & just hope that I've gotten it right. Needless to say, my profound lack of carpentry skills is becoming appallingly apparent. Oh well, I'm hoping that drowning the joint with glue will fill it enough. At least this part will be under paint, so I can use heaps of filler if required. I'm not too worried about loss of strength in these areas, because this whole area will be doubled up with fiber glass. I'm also thinking about using a bit of the more structural type filler on the inside bilge area, especially to compensate for the poor garboard joints that I described earlier. Don't know if this is paranoid overkill, but since I'm planning to use this canoe in the surf at Box Head a lot, a piss weak hull bottom is the last thing I'm wanting to be worrying about.


The third thing I've found is the fact that these hood ends are now getting longer & longer, in fact way too long for my trusty little Japanese pull saw. There's only two levels to go now & the final one is going to have to be ripped full length, plus hood ends cut. It's power tool time.
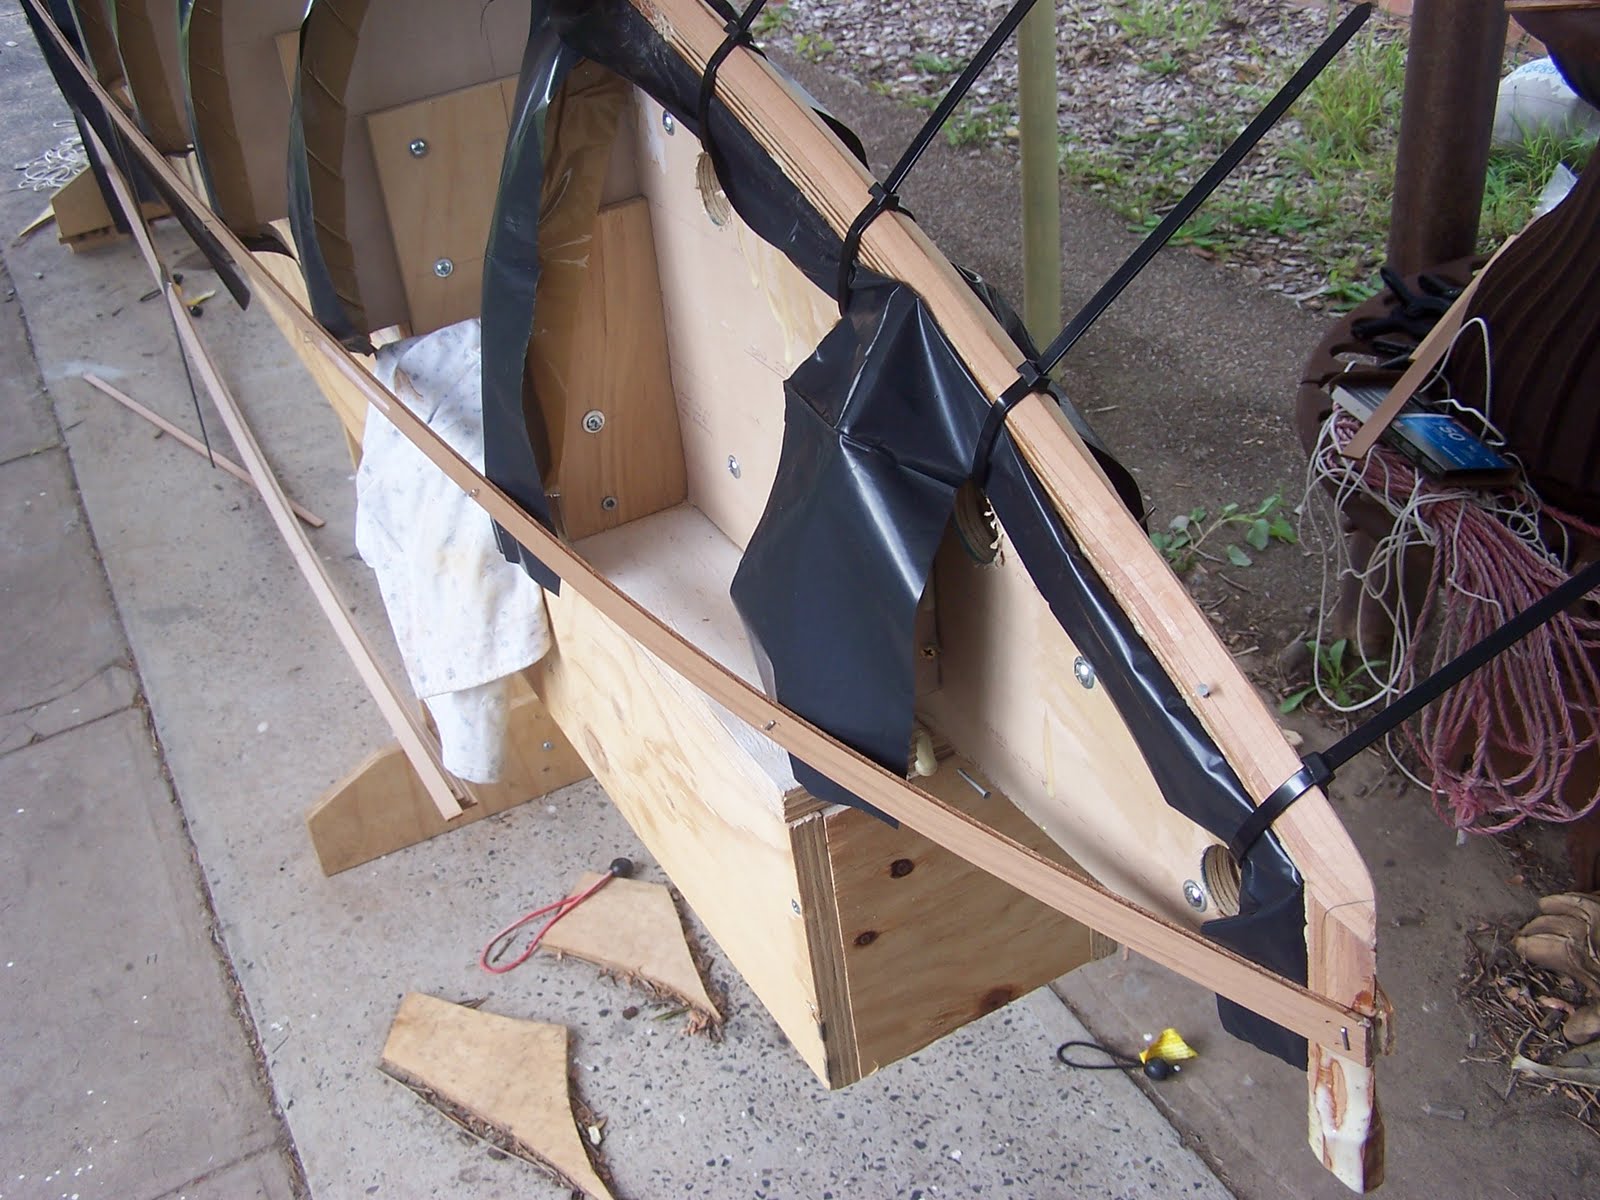
Since it was by then pretty late & getting quite dark, I had to pull the pin & stop for the day. The photo below shows how close I got to finishing.


All of the news over the last few days has been filled with concern over some epic bad weather on the way, apparently due to hit this region on the Sunday. Heavy driving rain & cyclonic winds were predicted & we were warned to prepare for the worst.
"Bugger" I thought, "I'm going to lose a whole day now". Never mind, can't be helped I guess, so I had a good clean up and lashed the canoe in place, so it couldn't possibly blow over.

This morning dawned bright, clear & calm, as you can see in the photos below.


Since I could see lots of cloud on the horizon, I agonized for ages as to whether or not I should untie the boat & continue with the planking. Eventually I decided that it'd be bad to finally get it all finished and then have the bad weather hit, forcing me to tarp up & lash the hull again, this time with wet glued planks.

Instead I resolved to continue with my experimental test panel, which has sat in my shed for weeks. I gave the epoxied panel a quick sand and found what I had suspected. The epoxy mix was way too thick when I'd applied it & hadn't saturated the weave enough. Also, the single coat of epoxy wasn't thick enough, meaning that I'd had to sand into the glass cloth in a couple of parts.


I'd emailed Dave at Drive Marine (Boatcraft Pacific's agent here) sometime ago and asked him about it and he replied that I should use an additive that increases viscosity. So I picked up a bunch of scrap bits of cedar & whipped up another panel.


My plan is to order the additive (plus some other stuff) & have another go. This time, I'll also apply two coats of epoxy before the peel ply. If that all goes well, then I can go one step further & try applying the Aquacoat, to see how that looks finished. I'm glad that I spent this time experimenting with this system. I want to have it all properly sussed out by the time I actually go to apply it to my boat for real.

And how did we go with the apocalyptic weather predicted? Well, it's now about 1600 and it's still clear & sunny outside. Wonderful, wasted the whole day. I'm back to work Monday & Tuesday but then I have the rest of the week off to try & make some progress. Only problem is, they're now predicting rain for the whole week. Hopefully they're just as inaccurate with this prediction as they were with today's one.

Tuesday, May 25, 2010

Bit More Planking (nearly finished)

After yet another sluggish start this morning, I finally got stuck in to this planking stuff again.
I had hoped to knock the planking off once & for all today, so I gave it a red hot go.


In the end, despite a strong effort, it was close but no cigar. I guess I'd underestimated how long it takes to do all those fiddly hood ends (I reckon they do look good though). The following is a gratuitous bunch of show off photos, revealing how far I did get.


At least there should be no excuses not to get this part completed when I get my next window of opportunity (Sunday). This boat building business seems to take a lot longer to actually do than I initially thought (....of course, sitting around with the missus, swilling coffee for half the morning doesn't exactly speed things up....). Still fun though.

Friday, May 21, 2010

More Planking (but finally some progress)

Ok, I've just had three days of intermittently interrupted days for getting some planking done and I have to say it's finally starting to get somewhere.

These photos show Wednesday's results (lots of interruptions that day).


Here's Thursday's results.


And finally Friday's. She's actually starting to look like a boat.


Fitting the garboards proved to be interesting. They need to be beveled where they meet in the center, which sounds much simpler than it actually turned out to be. I started by using my freshly sharpened chisels but it was slow & awkward in work and the result was pretty ordinary.


So I opted instead to set up my trusty sanding station in the back yard & set the shelf thingy roughly to a 45 degree angle. Then, donning mask, I quickly sanded the bevel on the garboard planks.


In the end, the angle I'd arbitrarily used was too sharp, meaning that the edges don't have too much surface contact but I decided to use them anyway. I'm planning to triple up on the layers of fiberglass in this area, plus I'd hate to waste such beautiful wood. Besides, the join does match up pretty good otherwise.


Then I managed to get another couple of levels of planks in as well. The Japanese Pull Saw is an excellent tool for the precision work of cutting the hood ends (even with the teeth starting to fill up with glue). I was able to get quite accurate, which surprised me no end.


So far, one potential problem that has had me stressing has been the edge-setting of the planks in the ends. I've found it very difficult to get the planks to lay completely flat, meaning that in some parts it is almost a clinker type finish. I don't know whether or not this tendency has been exasperated by my leaving the end molds with the extra width.
Gary's book says that you can tape up a small strip and staple to it between stations to help maintain edge alignment, but because I'm hoping to have the topsides finished clear, I didn't want to leave heaps of staple holes between the molds. I'm really hoping that I can still fair it all in without losing too much timber. Since I'm planning to paint below the waterline, I'm not so worried in that area because it's a simple matter of fairing any hollows with filler, but that's obviously not an option if it's an area that's to be finished clear.

Oh well, nothing for it but to wait and see how it looks once I've scraped the 3.75 tons of dried glue off & sanded/faired the whole hull. It'll be a terrible shame if I end up having to fill & paint the topsides & cover up all that nice timber grain.

I've entered the crap part of the roster again, so my next window of opportunity isn't until Tuesday. With a bit of luck, I may get the planking finished then.

Sunday, May 16, 2010

Planking Begins (just)

Well, Saturday was a bit of a loss & Sunday got pretty chewed up too (lots of usual family duties), but at least I did get something productive done on the canoe in the end.

After the usual Sunday morning family cook-up breakfast yesterday, I went out to see if I could get this mythical planking process under way. I covered the stem molds in black builders plastic that I had picked up Saturday afternoon. Then I used cable ties to secure the permanent stems to the stem molds, with a couple of thin nails thrown in for good measure.

Bow shot.......


.....and stern.


Then I had to stop, so as to head back out to the Army Cadet camp to pick up my son & his mate. It wasn't until about three hours later before I was able to get back onto the job.
Working as fast as I could, I cut more strips of the plastic & covered each of the intermediate molds with them. Once this was done, it suddenly dawned on me that I was finally ready to start whacking on some planks.

With this project about to move further into the harsh world of non-reversible reality, I nervously grabbed the first couple of planks & got to the task of aligning & fitting them. I think I got the sheer strakes reasonably straight. I followed the edges of the molds as best I could, and to my novice eyes it all looked ok.


The light just beginning to fade but I desperately wanted to get at least one more round of planking on each side before knock off, so I ploughed on. This second lot of planking took a bit more fiddling around, mainly due to my wanting to stagger the butt joints as much as possible. Even so, It didn't take very long at all and I started to get excited at finally seeing a more three dimensional outline of my boat emerging.


One part that had me worrying was the edge alignment toward the ends. The planks just wouldn't maintain the twist that I would've liked, meaning that the bead of the second strake wouldn't quite lay properly into the cove of the sheer strake. I tried & tried to correct it but, in the end, I just had to accept it. It doesn't seem to be out by all that much, & it'll hopefully sand flush anyway, but it's not perfect & it bugs me. Similarly, the gaps at the stems (mainly the bow), caused by my amateurish shaping efforts, came in for some fussing and swearing.
Of course, these minor defects will hopefully be compensated for by my seemingly unavoidable tendency to absolutely drown everything in copious amounts of glue.

Speaking of glue, I called up Dave from Drive Marine Services in Beverly Hills, NSW (our local Boat Craft Pacific people) and spoke to him about my glue concerns. He was excellent & told me that the stuff that they sell, while slightly better than what I've already got, would behave in a similar manner with regards to foaming out of gaps. He recommended that, since I'd already bought the durabond, it should be fine to use & to save my money. That's honesty & service that you don't find every day.

I must say that I've been pretty impressed with these guys in general. Some of their stuff was a bit more expensive than elsewhere, but other items were quite competitive. Moreover, when trying to get quotes and/or information from loads of other confusing/ignorant sources, Dave & his people couldn't be more helpful. I would highly recommend them.

Tuesday, May 11, 2010

Testing Times Again

Yes, testing times again but don't worry. I'm not about to start whinging about not planking yet. In fact it's all good.

Today got off to a great start with an early morning swim before brekky (got to get back in training, so I'll be able to fit in this canoe when it's finished). Then, after a relaxing few coffees, the rest of the morning got absorbed with fixing a folding machine for my wife's business. Once that was done, it was time for a quick early lunch and I finally got stuck into the boat in the early arvo.

I'd come to the conclusion that I've been stressing needlessly over this whole planking business. This boat will be "born" when it's ready & striving to "induce the birth" will only lead to defects & a crap finish. I've now resolved to just focus on the next few steps at a time & let the boat dictate when it get finished. I think I was getting impatient partly because of the magnificent weather we've had lately & I can't stop imagining being out there in my canoe.

Firstly, I sussed out a solution to a potential stuff up I'd made on the newly widened stem molds. When initially setting up the molds at Stations 1 and 17 (the first ones at each end, mounted on each side of the stem molds), they had to have a strip cut out of the middle, exactly the width of the stem molds, then attached to either side. Back then these stem molds were 12mm but they are obviously double that now, meaning that the strip I'd cut is only half as wide as it should be. I'd just thought of it yesterday. I was about to remove them again and cut a 6mm strip off each side, re-affix, re-tape and re-shape the permanent stems to the new angle. But after pondering for a while & fidgeting with battens, I decided to leave it. It will marginally increase the volume in the bow & stern, which may slightly increase resistance when paddling, but couldn't hurt when sliding down a wave out at Box Head. Plus I intend to carry loads from time to time (camping, diving, fishing gear, etc), so it could actually come in handy. Besides, if I wanted a boat solely based on paddling performance, then I'd have gone for an OC1. I doubt I'll be able to notice the difference anyway.

That decided, I got on with finishing off the permanent stems. I removed the bow stem & gave it the sanding treatment. In short time it was all done & ready for planking.


When I removed the bow stem, I noticed that it had stuck a little to the stem mold, where I had re-glued the short vertical bit. Not much, but I did have to use just a little bit of force to get it off, even though there was hardly any glue overflow there. This had me wondering about the task of removing the fully planked/fiber glassed hull from the assembly.
I think I'm going to put a layer of sheet plastic over the whole mold assembly before planking now. At least then I should be sure to be able to remove the hull without damage and swearing.

I think I'm now pretty much at the point where I can finally starting planking (no hurry). Since it was getting a bit late in the day, I thought my time would be best spent working on my test panel. I'm keen to see what this Bote-Cote stuff is like to work with. It's supposed to be easier to use & less hazardous for incompetents like me.

I took the panel out onto the lawn & merrily sanded the rough side. I'm so glad I did this, because it brought to light a potentially horrible problem. It seems the glue I've been using might not be so good for my purpose. It foams up in the joints (which is great) but where there are biggish gaps, it can leave big voids (which sucks).


I think that the stems should be ok, because so far I haven't found any gaps or voids in them. Because my planking stock edges all have bead & cove finishes, there shouldn't be any gaps there either but I reckon it'll be cheap insurance to use something more appropriate. Pacific Boatcraft, who supplied all the glassing stuff, also sell some glue that is supposed to be good for strip planking, so I'm going to splurge out on that instead.

Anyway, I set up in the shed & let the fun begin. The blue stuff in the photo is "peel ply". I've heard the name of this before, but I'd no idea how it works. Only that it apparently helps leave a very smooth finish.


Stepping through the instruction booklet, I mixed up a small batch of epoxy & proceeded with the sheathing. I'm something of a fiber-glassing virgin but this epoxy seems so different to the polyester resin that I've been playing with lately. I hope I mixed it right. It was much thicker than I expected, sort of the same colour & consistency of.......well.....shall we say certain gentlemanly fluids.

Once I'd wet out the fiberglass with a thickish coat of epoxy, I used a small consolidating roller over the sheet of peel ply. It went pretty smooth, except for a bit of a wrinkle that I just couldn't seem to get rid of. Apparently now I've got to wait till it all cures, and then peel the peel ply off again, to reveal a smooth surface that requires relatively little sanding.


You can see the wrinkle a bit better in this photo (going across the grain).


Since I had some left over epoxy, I decided to give a scrap piece of ply a good coat, to see how it goes too. I've got my eye on a particular boat design that I'm thinking about building in the future (a Tahitian double canoe), which is constructed of stitch & tape ply (see James Wharram site for 21 ft Wayfarer design).


So, there you go. Only a half day, but pretty constructive none-the-less I think. I've got to wait until the weekend now, before I can play some more. Maybe even.......a spot of planking?

Friday, May 7, 2010

Planking Delays

Boat building sucks. It's like pushing runny poo uphill with a pointy stick. I had all good intentions of having a half planked hull by this time tonight but, despite a very busy day, things didn't work out quite like that.

First up I, I took the stems off the molds to shape them in readiness for beveling. That went easily enough.

Before...


After. Too easy.


I took them back & clamped them onto the molds. Then I figured I'd take a (quick) closer look at a couple of intermediate molds, to see if I could work out why they "weren't quite right". In mounting the molds, I was always as careful & accurate as I could be but a few molds still seemed to be out by a few mm.


Anyway, after lots of time and much jiggling, batten adjusting, head scratching & measuring (nearly ALL) waterlines against the table of offsets, I finally discovered that some of the waterlines on the templates seem to be a couple of mm out in places. These appear to have combined to cause the slight anomalies with mold alignments.


Mulling over a plan of action and playing around with some of my planking stock, a simple solution occurred to me. If I just don't staple the planks at stations where the molds are a bit smaller, then the planks won't get pulled in and unfairness in the hull should be eliminated. I don't want to get bogged down with shimming/packing out the molds and besides, the strength is going to come from the glued edges anyway.

Very conscious of the huge amount of time I'd just wasted, I decided to move on with the beveling of the stems. This was fun (flat spokeshave seemed the best tool to use). I have to say, I thought it was very therapeutic, sitting there carving away. Wasn't overly skillful & I probably looked like a bit of a butcher but it turned out surprisingly ok. The only problem was that the short , fragile, vertical section broke out again (a bit too vigorous with the side pressure), so I had to glue it back in afterward. I'm holding it in position in the photos below.


Because this part took forever, when I got to working on the stern stem I decided to try something different. I marked roughly where I'd have to bevel, then removed it & took it to my sanding station (set up on the grass, so as to not fill my shed up with toxic cedar dust).
This seemed to work really well & I managed to do the whole stern stem, instead of just up to the first clamp like on the bow stem.


By the time I got all this sorted, it was late arvo & the normal family duties were calling. So I packed up & fumed quietly at the missed opportunity of finally getting some planks onto the molds. I'm back into the crappy half of my fortnightly roster, with only Tuesday next week available to try & make some headway. At least I really should be able to start planking now (after finishing off the bow stem of course). How long could it take?........

Those people out there who are experienced in the boat building world, or construction in general, are probably scoffing at my naivety in accurately projecting likely job time frames. Perhaps I'm just getting a little too impatient. It just seems such a bloody long time & so much work, before I even get to the starting point. Surely things will pick up now? Won't they?

Thursday, May 6, 2010

All Set for Planking

Yesterday was insanely busy, so I wasn't able to post about my progress.
I got up to Rick's factory to find he'd been busy in setting up his router for my little milling operation. It was all aligned properly & he'd made up a brilliant jig which completely enclosed the spinning bit & held the planks perfectly against it. I was spewing I'd forgotten to take my camera. It only took me about one & a half hours to mill all of the planks & they came out great.

Rick had also sussed the fact that the beaded edge of the planks aren't exactly a true radius. Plus the fact that one edge of the newly milled coves tended to be very slightly rougher than the other (if that makes sense), so he made a point of showing me how to select which way to slide the planks into his router jig, to obtain the best possible fit/finish when eventually fitting the planks onto the molds. He further instructed me to mark the best face (which will end up on the outside of the boat) with chalk, so as to simplify things for me later. How's that for attention to detail? Man I owe this bloke, big time. I reckon I would've botched this job if left to my own devices. As if all that wasn't enough, he even delivered the planks that I couldn't fit into my car, to my home after he finished work.

Anyway, the rest of the day/night was taken up by a combination of the usual kid's stuff, a trip to our financial planner and dinner/movie for our 15yr wedding anniversary, so not much more canoe action. Still, a very productive & satisfying day.

It was with much anticipation that I uncovered the canoe this morning. To my amazement, the clamps did come off (with a bit of gentle persuasion). Unfortunately, the same couldn't be said for the permanent stems. It would seem that the overly conscientious application of 350, 000 mega-liters of glue is not the method of choice for laminating up stem assemblies. Who knew?


Never mind, at lease it seems the glue DOES work. I spent most of the day getting the stems off and cleaned up a bit before refitting them to the molds. The short vertical bits did break off, so I had to re-glue them, meaning that I can't start beveling (to receive planking) until tomorrow now.


Whilst all this was going on, my fiber glassing supplies finally arrived. I got real excited when I realised that pretty much everything I need to build this canoe, is now on site. My only limitation now is time.

One canoe.......(some assembly required).


In preparation for planking tomorrow, it was time to tape up the molds. I'm really hoping to be able to get the canoe off the molds relatively easily afterward. See how it goes anyway (maybe control myself a bit with the glue this time).


Tomorrow's plan is to start the bevels on the stems and......(deep breath)....start planking!