Friday, November 21, 2014

Internal Fitout - Installation

Getting these parts installed has taken a bit longer than I'd expected, but I'm making good progress I think. Here's the state of play so far:

Day 1: With hot weather predicted, I evicted the car from the carport and set up there. First I spent some quality time making sure everything was as straight and level as possible.


Then I did a final test fit of the parts. 


I also spent some time fine tuning the bow and stern breasthooks, so that they really fit as perfectly as possible and provided maximum support. 


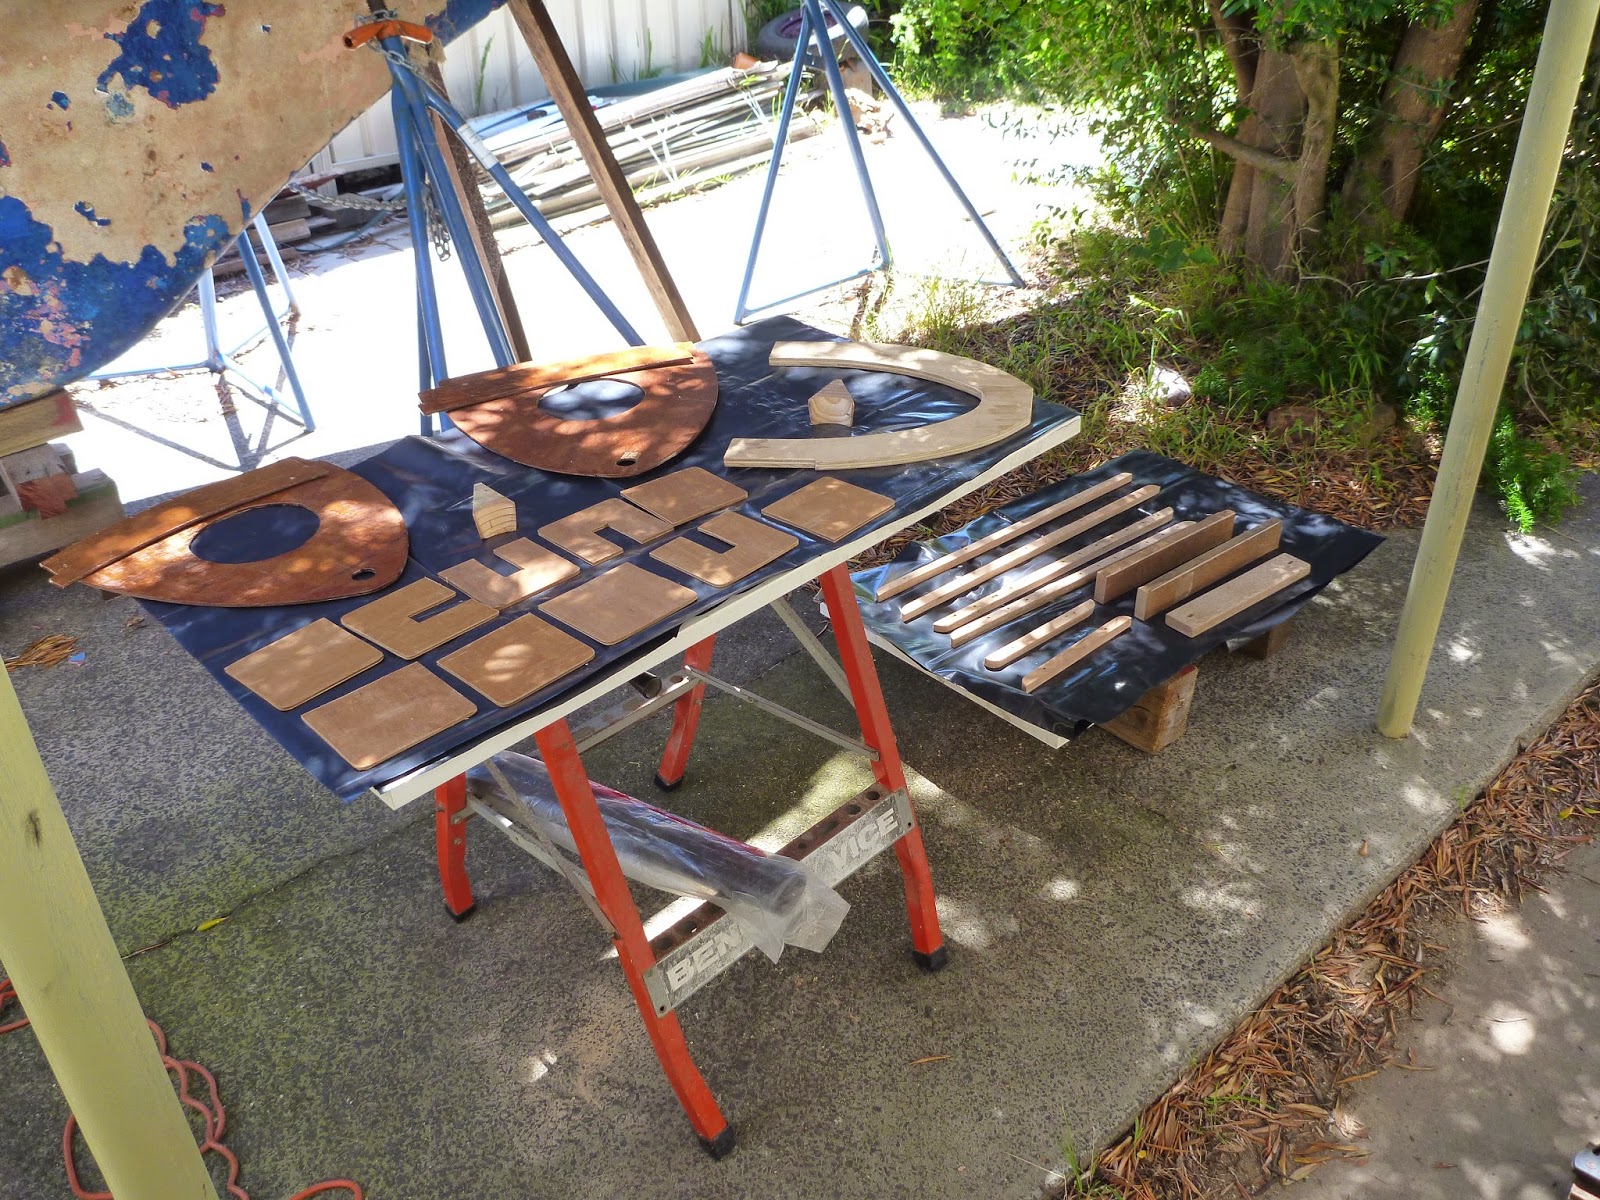
Here's a shot of the components all ready for epoxying….


And another after epoxying. 


Day 2: Each of the parts got a light sanding, and I also re-drilled all of the bolt holes. 


It was time to tackle the many epoxy runs from when I glued the inner wale. I tried using this smaller Surform, but its crap for this job. 


So I tried using this cheap kit for the drill. 


The wire brush attachment ground it down quickly, but it did tend to burn the underlying epoxy a bit. 


Then I went around and sanded the inner wale, ready for its soak coat of epoxy. 


Another productive day and everything seems ready to roll. 


Day 3: Finally installation day, and I was pretty excited. I was also a bit worried about clogging the bolt holes with epoxy runs, so after cleaning out the hull and wiping everything down, I tried to mask them off a bit. 


Then time for a final dry fit, and its time to rock. 


The tarp thing set up at the end of the carport in this shot is my old army hootchie, and shelters the stern of the canoe from the sun nicely. As predicted, it was getting bloody hot, but I'm on a bit of a mission at the moment so I pressed on. I did wait until the temperature peaked (at 35 celcius) and began falling, which wasn't until about 14:30. Then I was absorbed in an epoxying frenzy for the next five hours. This is the only photo from the session, which my son took while I was busily mixing another batch. 


Day 4 (today): Its blisteringly hot today (40+), and despite actually heading out there with all good intentions, I ultimately went for the 'bugger this for a joke' option and piked out. Instead I just inspected my handiwork from yesterday and took some shots for this blog update. 

There's a lot of cleaning up to do, but the results are mostly pleasing. Everything has cured nicely and feels quite solid. 


There were a couple of disappointments though. The main one was this forward bulkhead, one side of which seems to have dropped somehow. 


This really pissed me off. I've carefully cut the camber for the deck into this bulkhead, and now it's out. I'm not sure how I'm going to correct this one yet, but the thinking cap is on. 


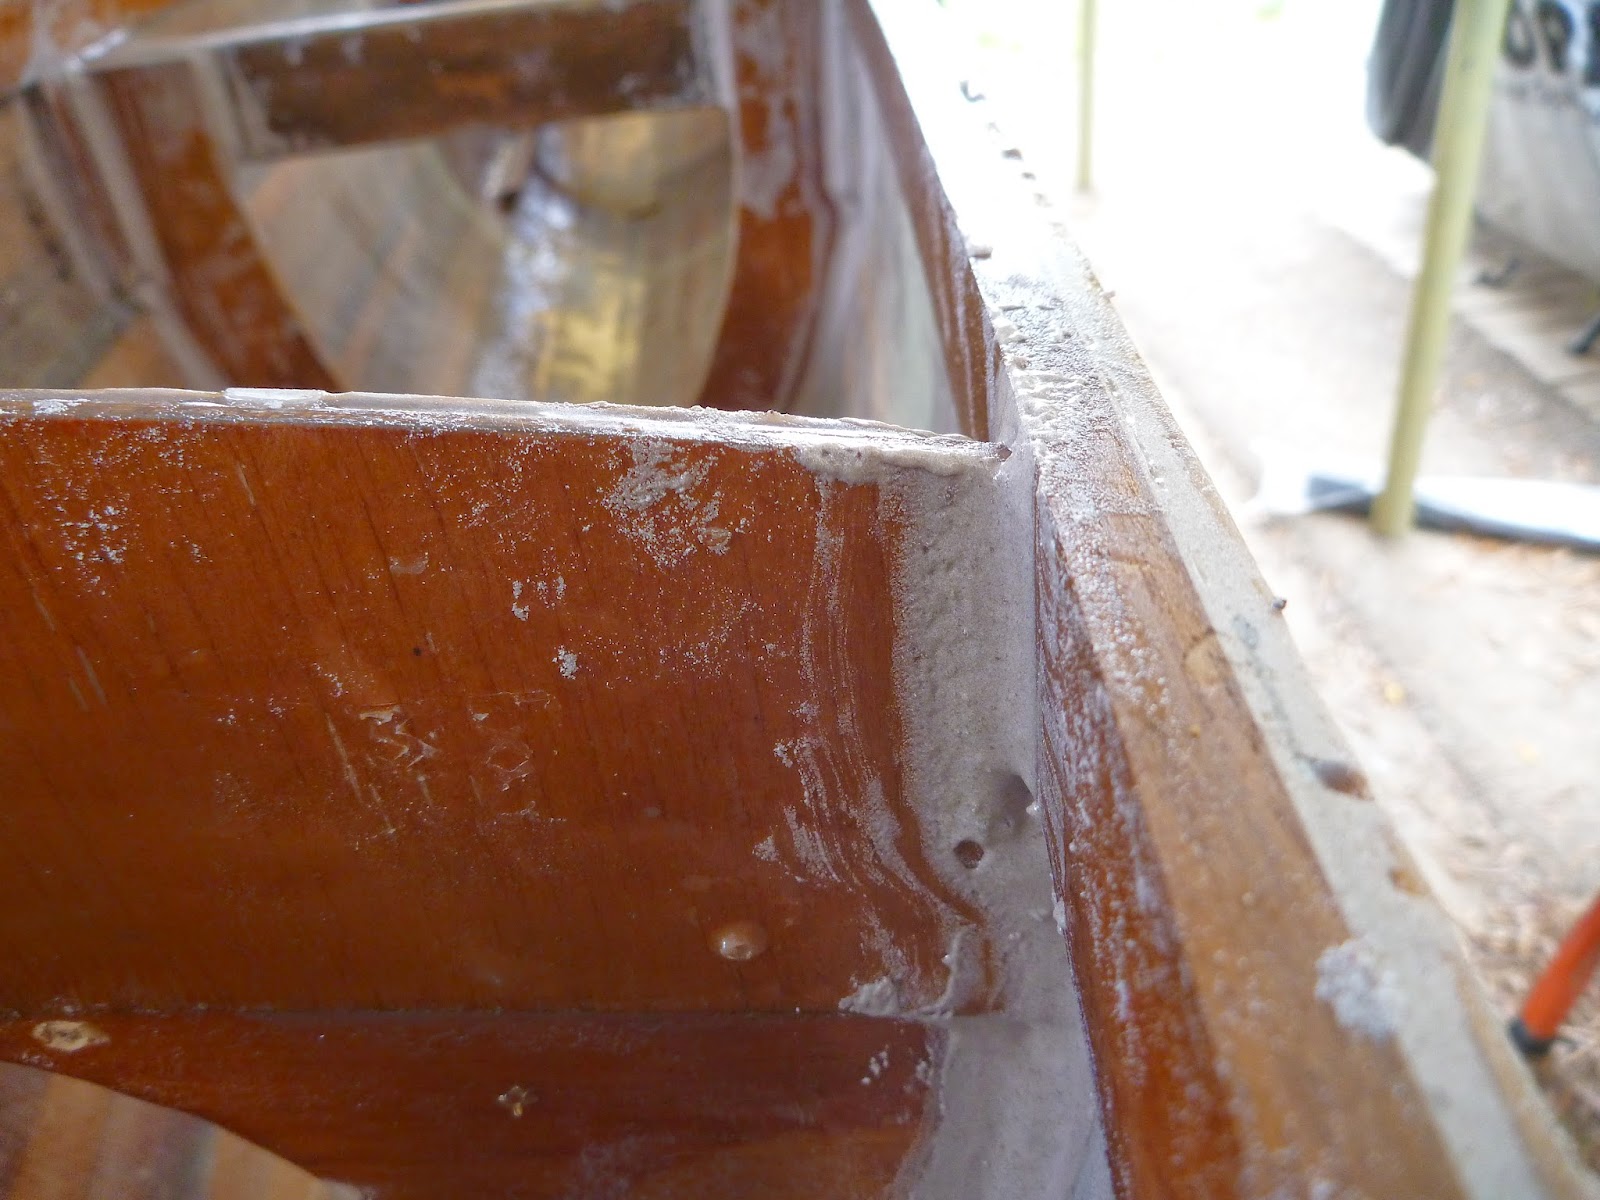
The other stuff-up has been the breasthooks. Both of them have dropped a bit. I thought I'd jammed them in quite well, but I guess the added slipperiness of the thickened epoxy must've allowed them to move. 


Its not the end of the world, since they've only dropped a little bit and they still provide heaps of strength in the bow and stern. I think I'll try to fill fill the gap with epoxy later. Hopefully these are the only problems that I'll have from yesterday. 

Anyway, tomorrow's another day and it sounds like being somewhat cooler than today (before ramping back up again on Sunday). I'm looking forward to getting everything cleaned up and sorted out, so I can get started on the decks. 


Friday, November 14, 2014

Internal Fitout - Ready to Install

Yesterday proved to be one of those rare days where everything was conducive to my boatbuilding aspirations. Nice cloudy day with temperatures in the low 20s, house pretty much all to myself and no school runs or errands to do all day. I was able to really get stuck in, and I'm stoked to say that I made heaps of progress.

After getting set up again it was time to suss out the steering pedal system. 


The pedals are supposed to be about 200mm (8") below seat height.


I measured out and drilled the holes for the adjustable side rails.


So far so good.


Because the side rails aren't exactly parallel I decided to make the cross bar holes into slots. 


I reckon this should work fine. 


Next I had some fun leaning how to use a plunge router (never used one before), and ended up radiusing the for and aft edges of the seats. Still need a bit of a final sand, but I'm pretty happy with the results. Thanks for the loan of the router Phil.


Then I re-did the forward saddles for the wae there. All good now. 


Then it was time to tackle the seat set up. After fiddling and wrangling for ages, I've eventually decided that I won't be keeping the seat stringers full length after all. I'll still make the aft seat adjustable though. It all took a fair while to work out, but I think I've got it all sorted now. 


I've drilled holes for three separate positions, which took some head-scratching given the taper of the rails. All seems to work ok now. 


I finished quite late in the day, but I'm so happy to get where I now am. The next bit is the exciting one of installing all of these components. I've so far got all of next week off, but the weather is predicted to be very hot. Fingers crossed I'll be able to get it all done. I'm stinging to get onto the decks. 

BTW I got a good reminder as to the hazards of using epoxy after the last activity sessions. My shins suddenly got real itchy and these sores suddenly erupted. I can only put it down to epoxy dust from sanding the forward bulkhead (I was wearing shorts). Going to be way more careful form now on. 


Saturday, November 8, 2014

More Internal Fitout


A bit of dancing around the usual work/family commitments and weather, but managed to get a bit more done. The main push at the moment is to get all of the internal bits finalised, so that they can all be installed in one go. 

The ends of the waes (crossbeams) terminate in saddles at the hull, and I had a bit of a think a bit about the best way to do this. In the end I decided to use the 2mm ply (salvaged from an old, junked wardrobe). I want one square at the end of the beam to spread any transverse loading, and another square with a slot cut for the beam, to help with any shear forces that might get applied at the beam ends.

To reduce any break out of the fragile ply when cutting, I used masking tape along the cut lines and a hack saw blade in my jig saw. This seemed to work well, since there was minimal damage. 


Then I clamped the resulting saddle squares together and cleaned them up on the sander.


Job done.


They seem to fit ok too. 


Even finish flush with the inner gunwales. 


Of course I also had to notch the ring frame, so it would fit around the saddles. One annoying oversight on my part was failing to allow for the 'lashing' holes for the Iakos (beams that connect to the ama) at this station. 


The hole size at the aft beam should be ok, but now it looks like I'm going to have to make up new (bigger) saddles for the forward beam. Spewing!


Anyway, I also made up a better breasthook (out of some scrap pine) to beef up the stern.


One milestone that I'm looking forward to is strip planking the decks. Because they're reasonably flat and small enough to handle easily, I'm hoping I can actually fibreglass them to a good enough standard to be left varnished. Its a shame the hull will have to be painted, but that's the way it has to be. At least with beautiful varnished decks and gunwales (and eventually seats), the canoe will retain a bit of a traditional/classical look. 

I admit that this has had me fretting a bit. I'm paranoid about cocking it up, and I'm constantly fiddling and pondering how I'm going to do it. One potential issue I think I've discovered is the height of my forward watertight bulkhead. It seems a bit high. Gary's book details how the gunwale should be cut to receive the planking of the deck, but planking over this bulkhead wouldn't even touch the gunwale. So I sanded it down a bit and it seems better now. 


So far so good. I think I've gotten these components as ready as I can get them now. 


I turned my attention to the seats and stringers. I cleaned up the stringers that I had cut earlier. They look good. Just need to radius the lower corner a bit and they'll be fine. 


I'd like to use some nice varnished timber for the seats, but due to the complete absence of any disposable cash at the moment I've decided to use some 18mm ply (I think it might even be marine ply) that I've had laying around for years. I'll bolt these in place so that I can replace them with the proper solid timber versions further down the track when I can afford it. 


Still need to radius the forward and aft edges, but looks ok. 


I'm planning to keep the stringers full length because I'd like to be able to adjust the aft seat position to trim the canoe when paddling alone. The forward seat will remain in the same spot because this is where the leeboard will be secured when sailing. Hopefully the stringers won't intrude into my 'knee room' too much. I figure my knees will probably be reasonable close together anyway, because my feet will be sitting on the steering pedals (which are the next bit to sort out, and can be seen laying in the bilge). 


I'm enjoying being able to make some progress with this build at the moment. I'm trying to get as much done, as fast as I can, because my work roster has me pretty busy around Christmas/New Year, plus it looks like being a bloody hot summer this year. And it would be so damn good to actually be out on the water for a change, instead of just fantasising about it all the time.